
I've been blogging fairly regularly (for me) so I think I am safe with setting a weekly posting goal!
I minored in clothing construction, unfortunately, I haven't been sewing or tailoring anything lately. So, from here on out, I am going to try and post tutorial Tuesdays that help illustrate some sewing techniques including pattern drafting, alterations, tailoring and dart rules.
This should be fun! If not just interesting....
Without further blabbering; here is a tutorial on how to alter shoulder slope when drafting or altering patterns:
(it can also be found through burdastyle.com where I posted it previously)
Technique Materials
A large piece of paper, masking tape, a heavy marker, a flat door or wall, pattern blocks (personal sloper or commercial pattern), a friend

Patterns are made for a perfectly symmetrical individual. The problem with this comes from the fact that most people aren't perfectly symmetrical and we don't all have the same curves and lines. There are many tutorials out there on how to fit a dart but this one is going to be focused on the shoulder slope. If you have ever noticed drag lines at the front of your garment, or pull lines, it means the slope of your shoulder is not the same as that on the pattern (don't feel bad! It is rare that it is the same!) Oftentimes one of our shoulders slopes more or less than the other one, if this is the case and the difference is greater than 1/4", you should make a right and left side for each pattern piece, or alter right and left. you do sacrifice the convenience of being able to cut on the fold, but that's a small payoff when you get a better fitting garment after spending hours on it.
STEP ONE
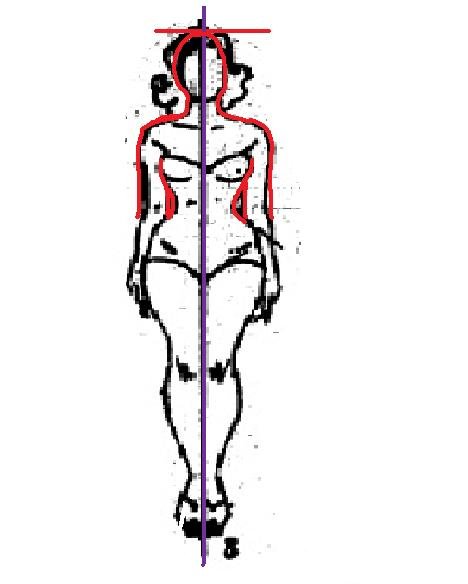
*Make sure you aren't wearing baggy clothing or excessively tight clothing* Take a large piece of butcher's paper (the length should be at least 6" above your head and extend down to your waist), you can also use newspaper, just be careful that your marker won't bleed through. Tape it up to a flat surface such as a wall or a door with several inches being above your head. Down the center of the paper, draw a line from above the head to about the waist. Stand with your heels, buttocks and shoulders against the door. Try not to lock your knees and try to stand relaxed and at a natural position, breathing naturally. Have your friend talk to you throughout this process to ensure you are standing and breathing naturally. Have your friend place a ruler on top of your head and trace a line where the top of your head hits the paper. Standing with your arms 3-4 inches away from your hips, have your friend begin tracing your silhouette from the top of your head at least to your elbows on each side and then under the arm from the elbow and back down to about the waist. It is important that the tracer holds the marker straight (parallel to the floor) and doesn't tip in towards the person being traced.
STEP TWO

(If you are creating your own sloper or block, use this method to adjust the shoulder slope to fit you.) Take your tracing off the wall and lay it on a flat surface such as a table or the floor. Get your pattern piece and lay it on top of the tracing, matching up the neck edge. (You have to be able to see your tracing through the pattern or tissue paper) Take note of the shoulder slope. If the shoulders are more square, or have a more pronounced shoulder bone, you will need to add height to your pattern, if the shoulders slope more, you will have to take away height.
STEP THREE
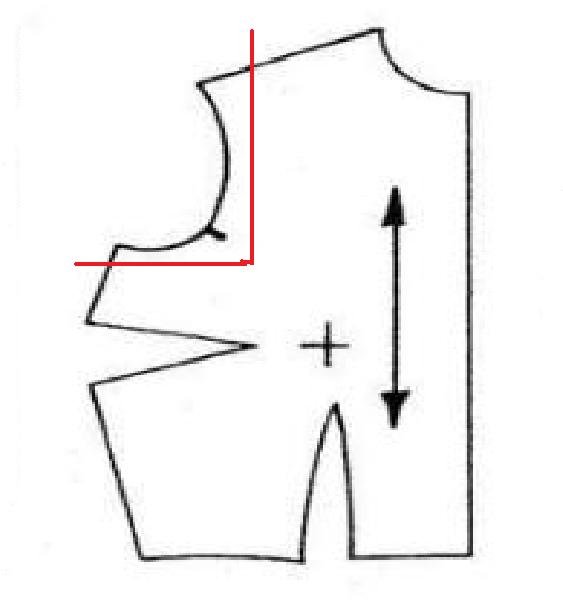
Now that you can see how your shoulder slope relates to the pattern you are making, you know where to begin changing your pattern. Make sure you have looked at both shoulders separately. There are many factors in our daily lives that can make you A-symmetrical (like carrying babies on one hip, carrying a heavy purse or backpack on one shoulder, how you stand, etc). If the difference in your shoulder slope is more than 1/4" you will want to alter your pattern pieces separately and then label them "left side only, this side up" and "right side only, this side up" To alter your pattern, take your pattern piece (if you need a left front and a right front make sure you have traced one off so you can alter it separately) and mark it for an "L" cut. Making the mark on the shoulder just behind the armhole and below the armhole then cut the armhole off. This cut is made so you are not altering your armhole, so the sleeve of the pattern will still fit without a problem. (This method is the same for kimono patterns as well)
STEP FOUR
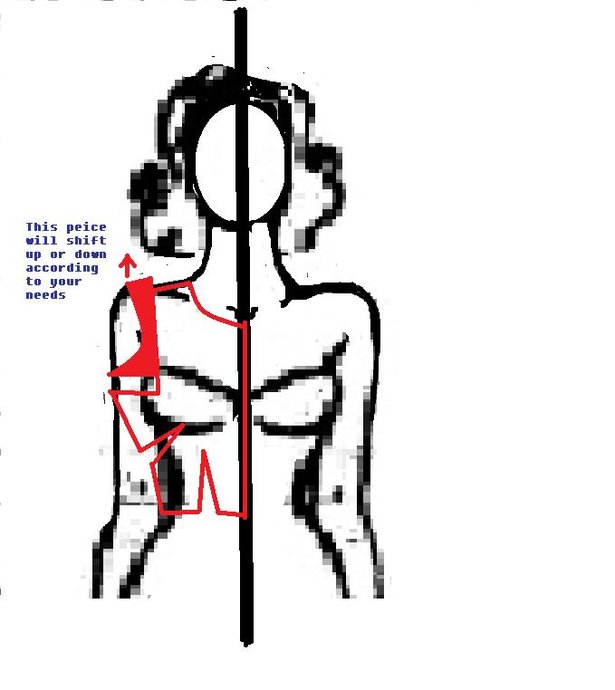
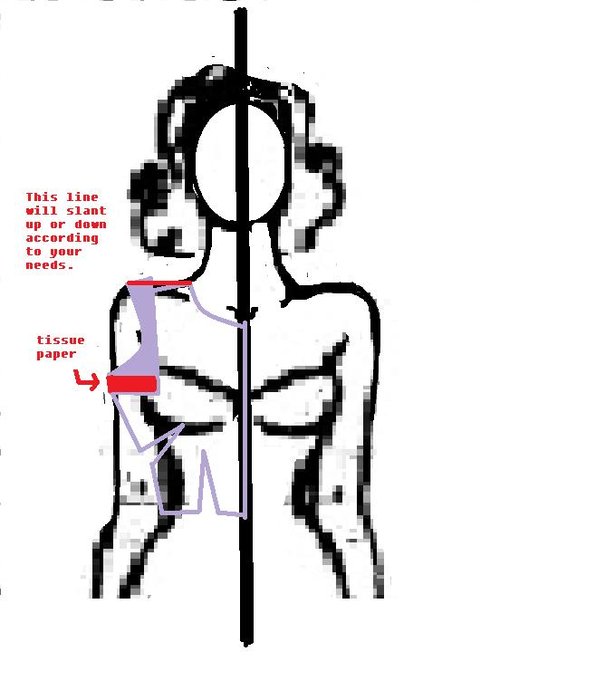
Place your pattern piece back over your tracing, lining up the neck edge and center front. Take the armhole section you cut off and place it so the shoulder edge lines up with where your actual shoulder slope is. Your pattern pieces will not make a line, and there will be a gap of space above the dart if you moved the armhole up to accommodate square shoulders or shoulders with a prominent shoulder bone, for the gap, tape a small piece of tissue paper in there to fill in the space. If you moved the piece down to accommodate shoulders with a greater slope, there will not be a space above the dart.
STEP FIVE
Happy sewing!
No comments:
Post a Comment